Contact Categories
Create custom categories and group your contacts purposefully – for example by customer, supplier, athlete or coach. This way you always maintain a clear overview even with a large contact list.
What Are Contact Categories For?
Contact categories help you organise your contacts in a meaningful way. Instead of managing all people and companies in one long, unsorted list, you can assign one or more categories to each contact – similar to labels on a filing folder. This makes searching and filtering much easier later on.
Examples of useful categories: Customer, Supplier, Athlete, Coach, Company, Member or Sponsor. You can add new categories, rename existing ones or delete those no longer needed at any time.
The Overview – All Categories at a Glance
Navigate in the spooorts Manager to Contacts and select the sub-item Contact Categories. You will see a table with two columns: Category (the name) and Description (an optional explanatory text). Each row represents an existing category.
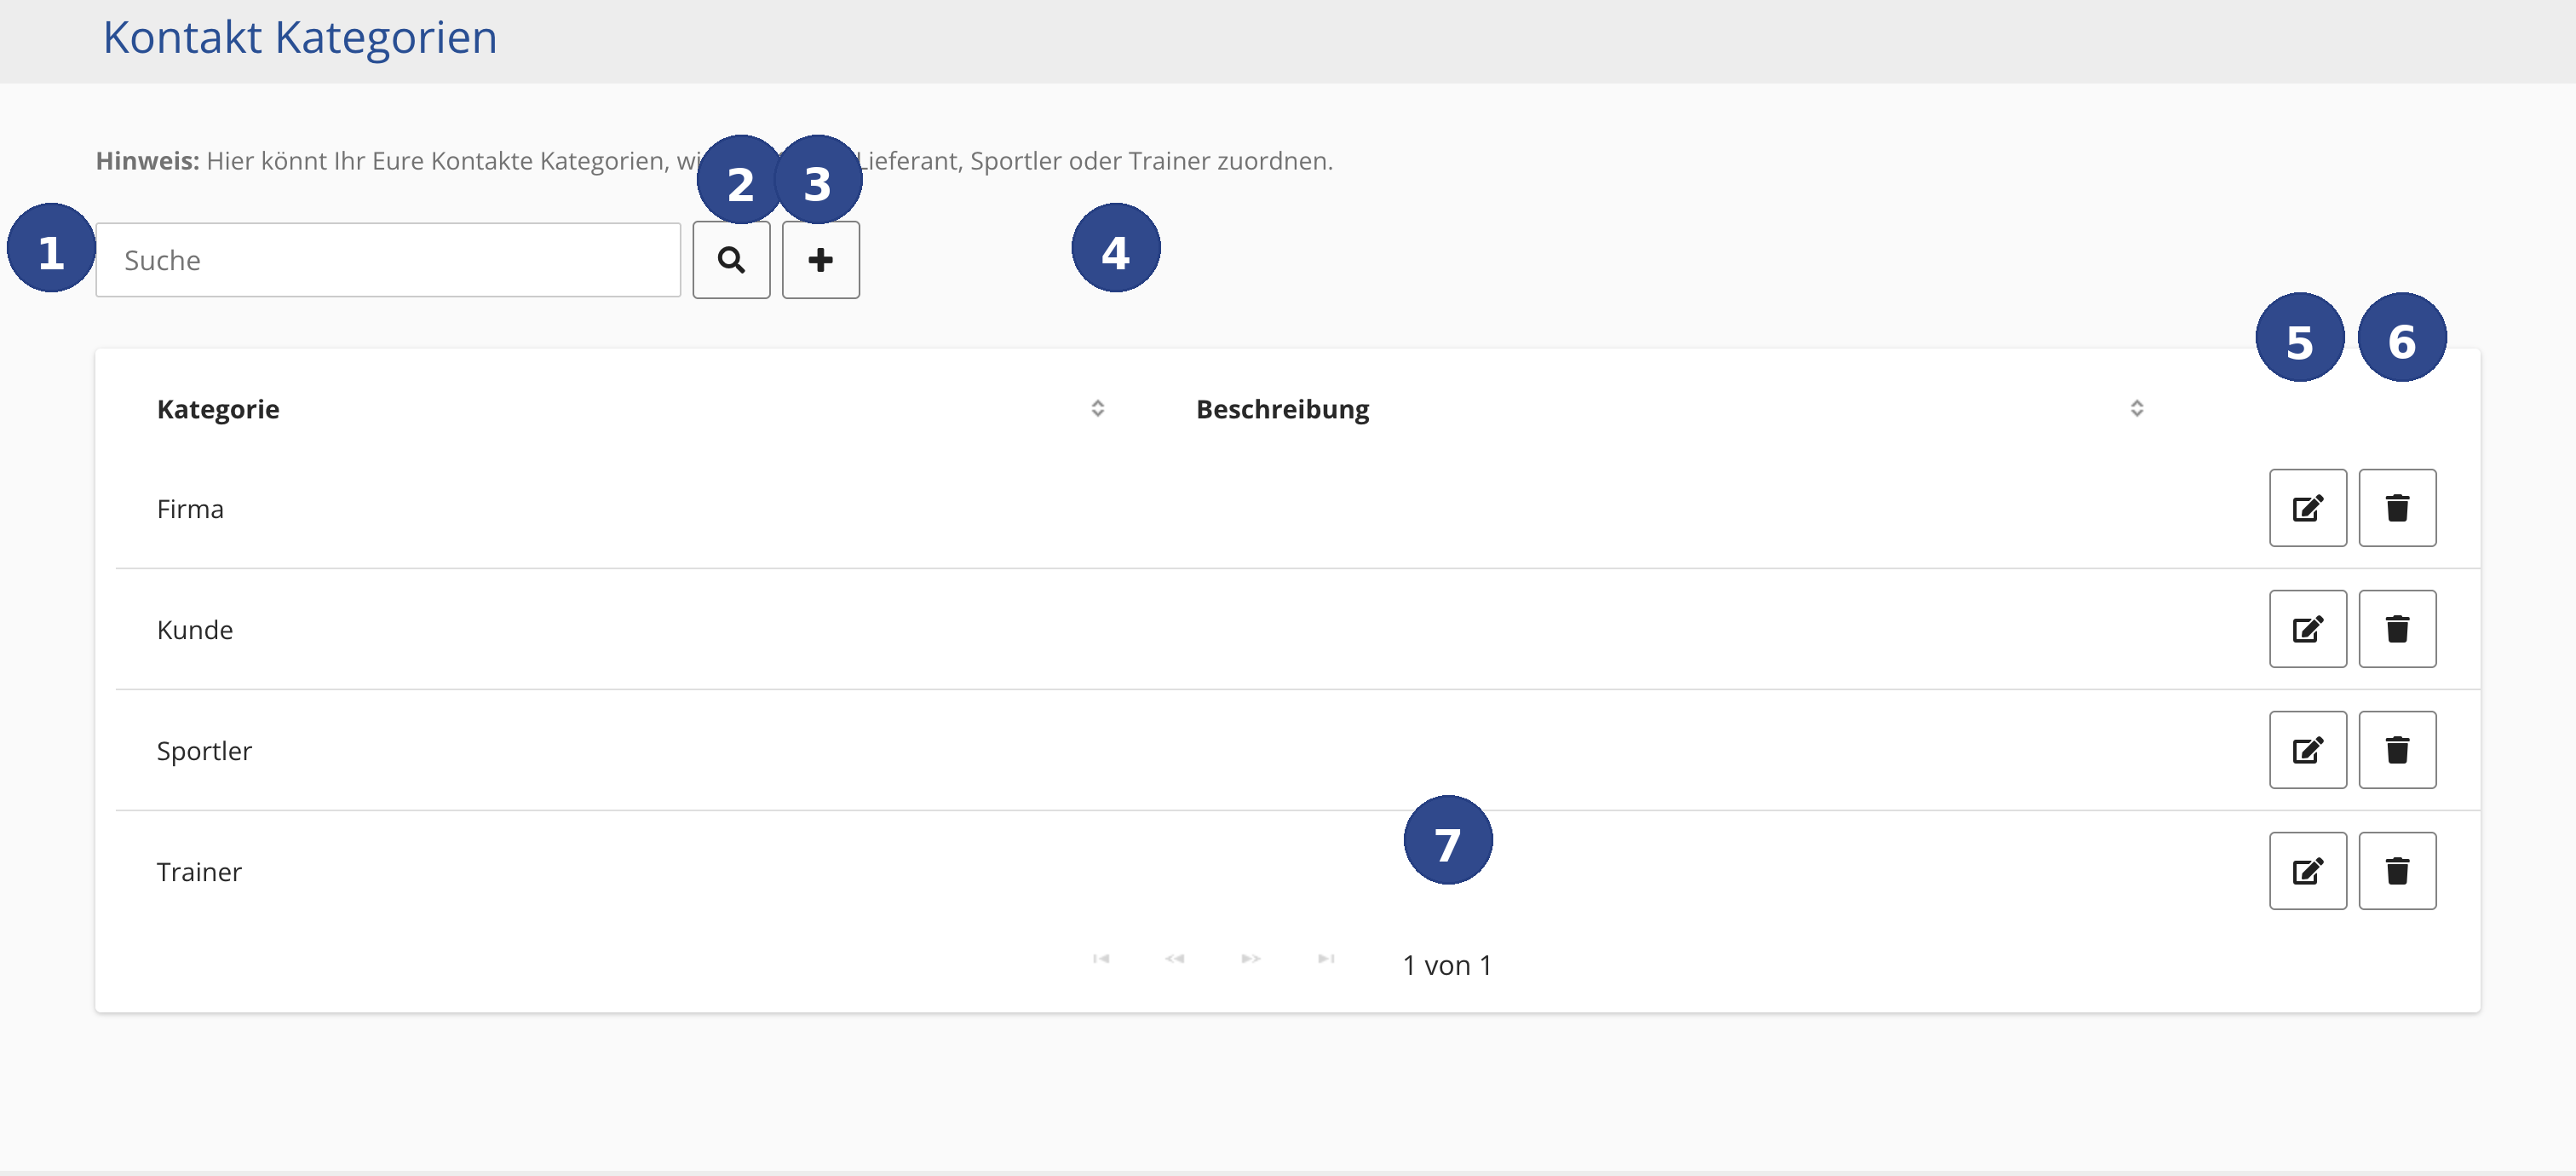
All Controls in Detail
- Callout ① – Search Field
- The text field in the top left is labelled Search. Type a search term here to filter the list of categories. This is useful when you have created many categories and want to find a specific one quickly. The search field responds as you type – you do not need to press Enter first.
- Callout ② – Search Button
- The magnifying-glass icon to the right of the search field starts the search manually, in case you prefer to type the full search term first and then confirm. Clicking it instantly shows only the matching categories.
- Callout ③ – Create New Category
- The plus icon (+) opens a form where you can create a new category. Enter at least a name – a description is optional but recommended so that all team members understand what the category is intended for. Confirm with Save to add the category to the list.
- Callout ④ – Sort Columns
- The small arrows (up/down) next to the column headings Category and Description allow you to sort the list alphabetically. A click on the arrow next to Category sorts categories from A to Z; another click reverses the order (Z to A). The same applies to the Description column. This helps you find what you are looking for quickly, even in long lists.
- Callout ⑤ – Edit Category
- The pencil icon on the right side of each row opens the editing view for that specific category. There you can change the name and the description. Save your changes by clicking Save. The change takes effect immediately for all contacts that already have this category assigned – the new name appears everywhere automatically.
- Callout ⑥ – Delete Category
- The trash icon next to the pencil icon permanently removes a category. Before final deletion a confirmation prompt appears so that you do not accidentally remove something. Please note: when a category is deleted, all contacts that had this category assigned lose this entry. The contacts themselves, however, remain intact.
- Callout ⑦ – Page Navigation
- Below the category list you will find the page navigation. Here you can see which page you are currently on and how many pages there are in total – for example 1 of 1. Use the arrow buttons (|◀ ◀ ▶ ▶|) to jump to the first page, the previous page, the next page or directly to the last page. The navigation appears automatically once the list contains more entries than fit on a single page.
Step by Step: Create a New Category
Here is how to create a new contact category:
- Click the plus icon (callout ③) in the top right above the table.
- A form opens. Enter a descriptive name in the Category field, e.g. Sponsor or Club Member.
- Optional: Enter a short explanation in the Description field so that everyone on the team knows when this category should be used.
- Click Save. The new category immediately appears in the list and is available for selection on all contacts.
Assign a Category to a Contact
A category is not assigned directly in this overview but in the detail view of the respective contact. Open the desired contact, find the Category field and select one or more of the categories you have created. Confirm with Save.